← All Tutorials
Proxmox VE backup with Iperius Backup
Iperius Backup is a solid and reliable software for backing up Proxmox VE virtual machines.
This feature allows you to:
-
Perform full backups of VMs or containers (LXC) by connecting directly to Proxmox nodes.
-
Automate operations through Iperius scheduling, so as to have regular and hot copies without manual intervention.
-
Save data to local, network, or cloud destinations while maintaining flexibility and security.
Furthermore, Iperius is one of the best Proxmox backup software thanks to the following features:
- Agentless: Back up virtual machines without installing any agents.
- Unlimited Proxmox hosts and unlimited virtual machines with a single perpetual license
- Lightweight and robust software, even for critical production environments
In this tutorial, you’ll see how to connect Iperius to a Proxmox cluster or node, configure backup jobs, and ensure constant protection of your virtual machines.
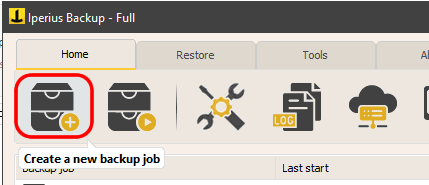
Add a new backup job:
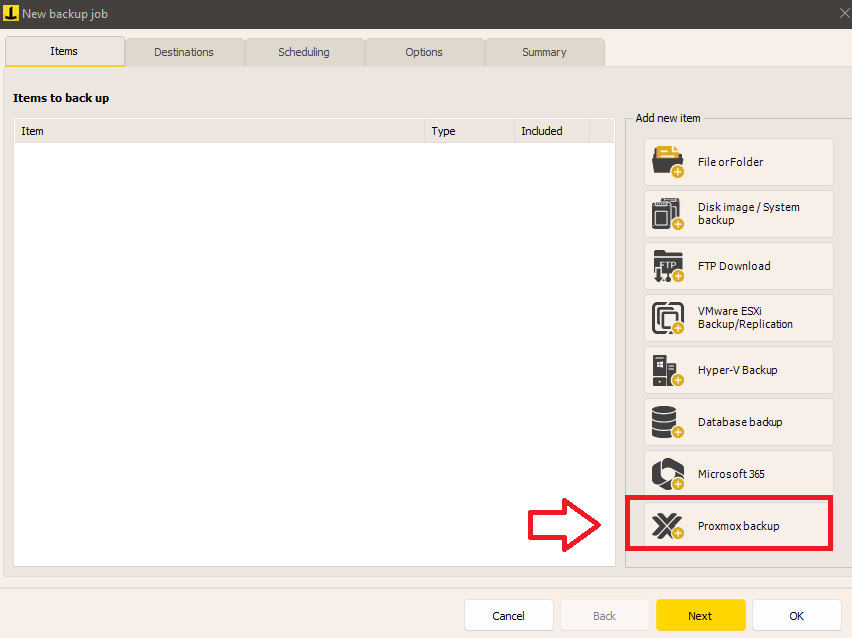
Add an item of type Proxmox to the backup:
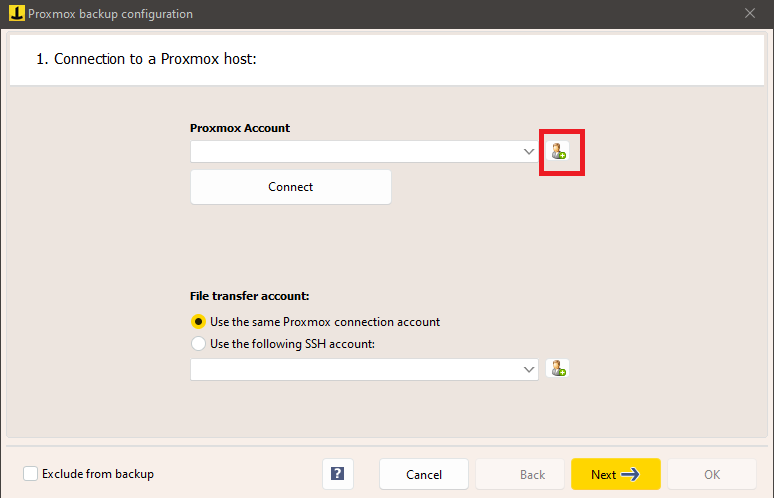
As a first step, you need to enter your Proxmox account, then define the server address, port, and administrator user credentials:
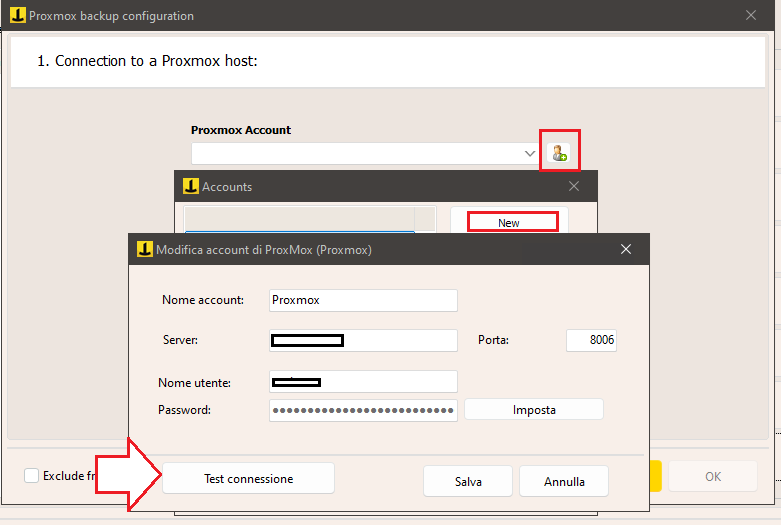
Click “Test Connection” to verify that your information is correct. If successful, save your account.
Connect to Proxmox with the account you just created, so you can proceed with the subsequent backup configurations (in the same window you can also choose a different account (SSH) for file transfer).
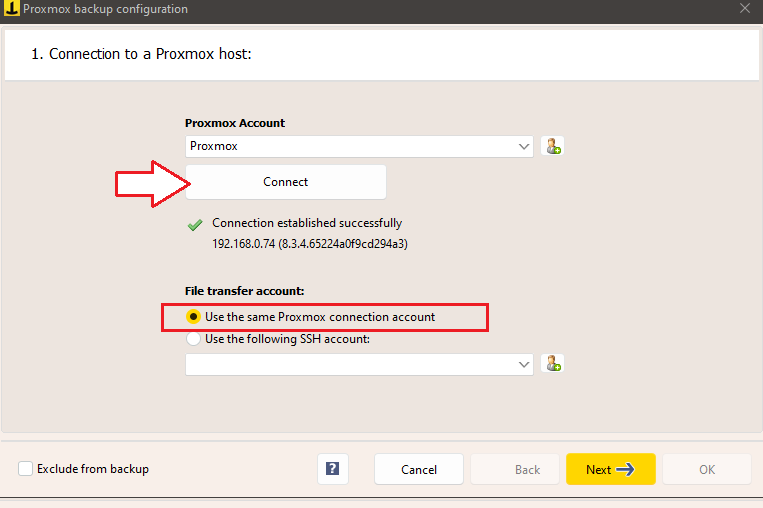
Click “Next”.
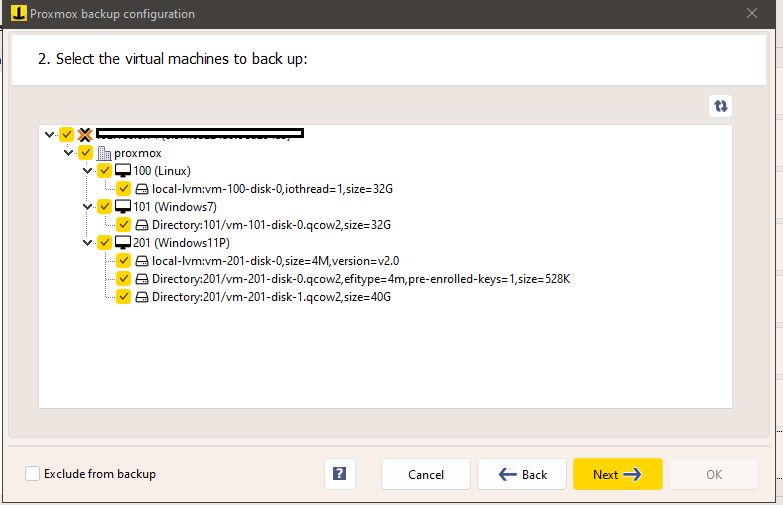
In the next tab you can see the list of all virtual machines present on the Proxmox host you are connected to.
Select the VMs and individual disks you want to back up:
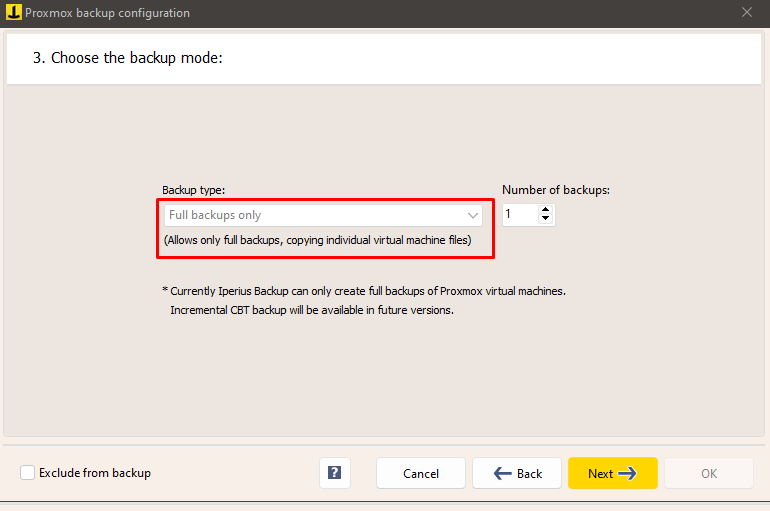
In the next tab you can select the backup type and the number of backup copies to keep:
Click “Next” and choose the backup destination folder.
You can choose a destination on a local disk or a network destination, such as a NAS (and also specify an account to authenticate to the shared folder):
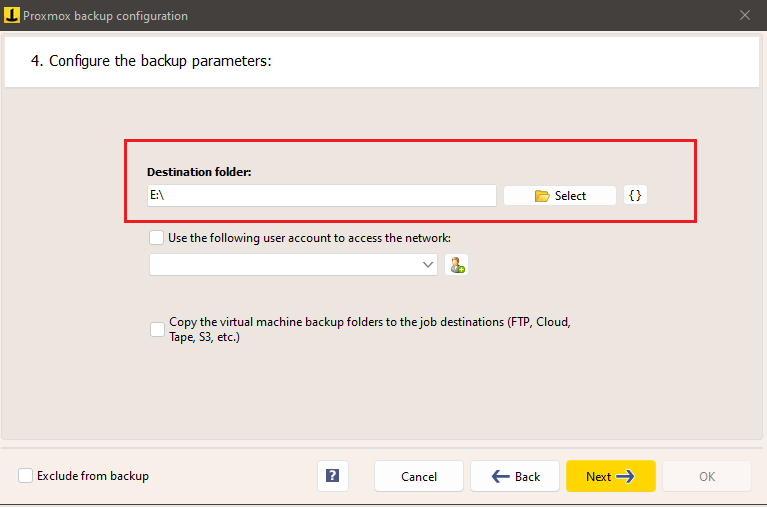
The last option (“Copy virtual machine backup folders to job destinations”) ensures that the virtual machine backup, once created in the local folder, can be further copied to the backup job destinations, which can for example be a cloud space such as Amazon S3 or Google Drive.
Finally, in the last tab you can see the summary of the selected virtual machines and specify whether to automatically add new virtual machines and/or new virtual machine disks to the backup (which can also be added after configuring the backup):
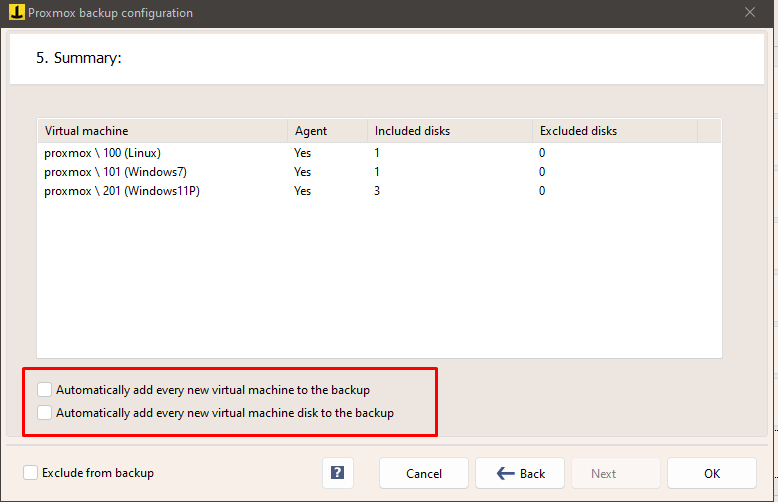
Click ‘OK’ to save the backup configuration.
If you want to make an additional copy of the Proxmox virtual machine backup to other destinations, such as an FTP server or Amazon S3 cloud space, you can add one or more destinations in the next tab:
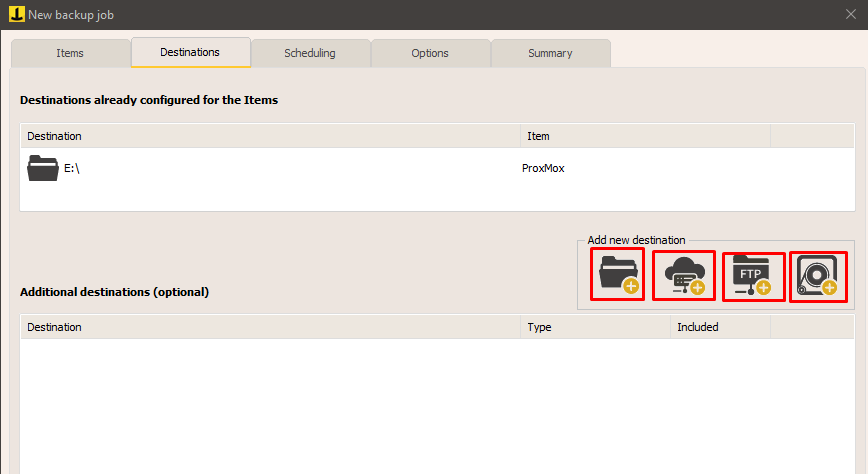
Finally, you can configure the schedule and additional options, such as email notifications at the end of the backup.
Once you’ve configured the backup job, you’ll find it in the Iperius backup job list.
To start it, right-click on the backup job you just configured and click “Run.”

—
See also: How to restore a Proxmox virtual machine
For any questions or doubts regarding this tutorial,
Contact us